

Adding income in FreshBooks is simple and straightforward. With a few clicks, you can track your earnings.
FreshBooks is a popular accounting tool for small businesses and freelancers. Keeping an accurate record of your income is crucial for managing finances. You might wonder how to do this effectively. This guide will walk you through the steps of adding income in FreshBooks.
Whether you are new to FreshBooks or looking to streamline your accounting process, this introduction will set the stage. By the end, you will feel confident in managing your income entries. Let’s explore how to seamlessly add income in FreshBooks and keep your financial records in top shape.
Credit: www.freshbooks.com
Introduction To Freshbooks
Freshbooks is a powerful accounting software. It helps small business owners manage their finances. This tool makes it easy to handle invoicing, expenses, and payments. Freshbooks is user-friendly and offers many features to keep your business organized. This section will introduce you to Freshbooks and its key features.
What Is Freshbooks?
Freshbooks is an accounting software designed for small businesses and freelancers. It helps users create professional invoices, track expenses, and manage payments. The software is cloud-based, which means you can access it from anywhere. Freshbooks simplifies financial tasks, saving you time and effort.
Key Features
| Feature | Description |
|---|---|
| Invoicing | Quickly create and send professional invoices. Customize them to match your brand. |
| Expense Tracking | Track and categorize expenses. Attach receipts for easy record-keeping. |
| Payments | Accept online payments from clients. Secure and fast transactions. |
| Time Tracking | Track time spent on projects. Bill clients accurately. |
| Reporting | Generate detailed financial reports. Monitor your business performance. |
| Mobile App | Manage your finances on the go. Available for iOS and Android. |
Freshbooks offers many more features to help you run your business smoothly. It is designed to be easy to use, even for those with limited accounting knowledge. With Freshbooks, you can focus on growing your business while it takes care of the finances.

Credit: www.youtube.com
Setting Up Your Account
Getting started with FreshBooks is simple and efficient. The first step to managing your income in FreshBooks involves setting up your account. This section will guide you through the initial steps, ensuring your journey with FreshBooks starts smoothly.
Creating An Account
To create an account in FreshBooks, follow these steps:
- Visit the FreshBooks website.
- Click on the “Get Started” button.
- Fill in your email address and click “Continue.”
- Provide your business details, such as business name and type.
- Set your password and agree to the terms.
- Click “Create Account” to complete the process.
Once your account is created, you will receive a confirmation email. Verify your email to activate your account fully.
Navigating The Dashboard
After logging in, you will see the FreshBooks dashboard. The dashboard is user-friendly and easy to navigate. Here is a quick overview:
- Home: Overview of recent activities and quick links.
- Invoices: Create and manage your invoices.
- Expenses: Track your business expenses.
- Reports: Generate financial reports.
- Clients: Manage your client information.
- Projects: Track your project progress.
The dashboard helps you keep track of your finances easily. You can quickly add income, view pending invoices, and track expenses.
With your account set up, you are now ready to add income and manage your finances efficiently. The next steps will guide you on how to add income in FreshBooks.
Adding Income
Adding income in Freshbooks is an essential task for tracking your financial health. This process ensures all your earnings are recorded accurately. This helps in understanding your business’s financial status. Follow these steps to add income in Freshbooks easily.
Accessing The Income Section
First, log in to your Freshbooks account. On the dashboard, locate the Accounting tab. Click on it to reveal a drop-down menu. From the menu, select Income. This will take you to the income section. Here, you can add and manage all your income entries.
Entering Income Details
Once in the income section, click on the New Income button. A form will appear where you can enter your income details. Fill in the following fields:
- Date: Choose the date you received the income.
- Client: Select the client from the drop-down list.
- Amount: Enter the amount received.
- Category: Select the category that best describes the income.
- Description: Provide a brief description of the income source.
After entering all the details, click on the Save button. Your income entry will now be recorded in Freshbooks. This helps in keeping your financial records up-to-date and accurate.
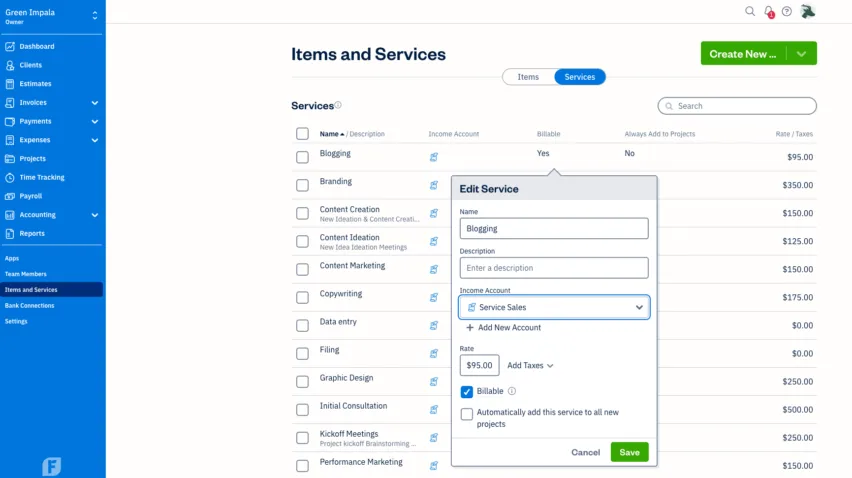
Categorizing Income
Properly categorizing income in FreshBooks is crucial for accurate financial records. This ensures you track where your money comes from. It also helps in understanding your business’s financial health. FreshBooks offers various options to make this process simple and efficient.
Selecting Income Category
Selecting the right income category in FreshBooks is important. Here’s a step-by-step guide:
- Login to your FreshBooks account.
- Navigate to the Income section.
- Click on New Income.
- Fill out the necessary details.
- Select the appropriate income category from the dropdown menu.
Common income categories include:
- Sales
- Services
- Interest Income
- Other Income
Choosing the correct category helps in generating accurate reports. This can be crucial for tax preparation and financial analysis.
Adding Custom Categories
FreshBooks allows you to add custom income categories. This is useful if the pre-defined categories do not fit your needs.
Follow these steps to add custom categories:
- Go to the Settings menu.
- Select Chart of Accounts.
- Click on New Account.
- Choose Income as the account type.
- Enter a name for your custom category.
- Save your changes.
Using custom categories allows for more specific tracking. This helps in better understanding your income sources.
Here’s a simple example:
| Income Source | Category |
|---|---|
| Freelance Writing | Writing Income |
| Online Courses | Course Sales |
Custom categories provide flexibility. They help in organizing your income in a way that makes sense for your business.
Attaching Documents
Attaching documents to your FreshBooks income entries helps you stay organized. It also ensures you have proof of your transactions. This is essential for bookkeeping and tax purposes. Below, we will explore how to upload receipts and link invoices.
Uploading Receipts
Uploading receipts in FreshBooks is straightforward. Follow these simple steps:
- Open your FreshBooks account.
- Navigate to the “Expenses” section.
- Click on “New Expense” to start a new entry.
- Select “Attach Receipt” to add your receipt.
- Upload your receipt file from your computer or mobile device.
Make sure the receipt image is clear and readable. This helps avoid any confusion later. You can also add a description to each receipt.
Linking Invoices
Linking invoices in FreshBooks is another useful feature. It helps keep your income records accurate. Follow these steps to link invoices:
- Log in to your FreshBooks account.
- Go to the “Invoices” section.
- Create a new invoice or open an existing one.
- Click on “Attach Document” to link relevant files.
- Upload the document from your device.
Linked invoices provide detailed transaction records. This can be vital for both your business and your clients. Ensure all linked documents are accurate and up-to-date.
Here is a quick comparison of the benefits:
| Feature | Benefits |
|---|---|
| Uploading Receipts | Proof of purchase, easy tracking, clear records. |
| Linking Invoices | Detailed transactions, client transparency, organized income. |
Both uploading receipts and linking invoices make your financial management easier. They keep your records clear and organized. This ensures you have a smooth bookkeeping experience.
Reviewing And Saving
After adding income entries in FreshBooks, the next steps are reviewing and saving. This ensures your records are accurate and up-to-date. Let’s dive into the details.
Reviewing Entries
First, it is important to review the income entries you’ve added. This step helps you catch any errors before saving.
- Check the date of each entry.
- Ensure the amount is correct.
- Confirm the client details are accurate.
- Verify the payment method.
Use the income summary table in FreshBooks to compare your entries. This table shows a clear overview of all income records.
| Date | Client | Amount | Payment Method |
|---|---|---|---|
| 01/01/2023 | Client A | $500 | Credit Card |
| 02/01/2023 | Client B | $300 | Bank Transfer |
Saving Income Records
After reviewing, the next step is saving your income entries.
- Click on the Save button.
- Wait for the confirmation message.
- Ensure the entries are saved under the correct category.
Saving your income records ensures you have a proper financial overview. This is crucial for accurate bookkeeping and financial planning.
Generating Reports
Generating reports in FreshBooks helps you understand your financial health. It provides a clear view of your income, expenses, and profitability. With reports, you can make informed business decisions. Let’s explore how to access and customize these reports.
Accessing Financial Reports
To access your financial reports in FreshBooks:
- Log in to your FreshBooks account.
- Navigate to the Reports section from the main dashboard.
- Select the type of report you need, such as Income or Expense.
You’ll see a list of available reports. Select any report to view detailed information.
Customizing Report Views
Customizing your report views helps you get the data you need quickly. Follow these steps:
- Open the report you want to customize.
- Use the filters at the top of the report to set the date range.
- Select specific clients or projects if needed.
- Apply the filters to update the report view.
With customized views, you can focus on the most relevant data.
| Report Type | Purpose |
|---|---|
| Income Report | Shows your total income over a period. |
| Expense Report | Details your business expenses. |
| Profit & Loss | Summarizes your revenues and expenses. |
These reports give you a comprehensive view of your finances.
Credit: www.freshbooks.com
Tips And Best Practices
Managing your income efficiently in FreshBooks is crucial for accurate financial reporting. Here are some tips and best practices to help you add income effectively.
Regular Updates
Consistently updating your income entries helps maintain accurate records. Make it a habit to record new income as soon as it is received. This practice ensures that your financial data is always up-to-date.
- Update entries weekly or after each transaction.
- Set reminders to avoid missing any income entries.
Accurate Categorization
Proper categorization of income is essential for accurate financial analysis. Ensure that each income entry is assigned to the correct category.
Use the following steps to categorize income:
- Navigate to the ‘Income’ section in FreshBooks.
- Select the relevant category for each income entry.
- Double-check for accuracy before saving.
Consider creating custom categories if standard ones do not fit your needs. This helps in better tracking and reporting.
| Category | Description |
|---|---|
| Product Sales | Income from selling products. |
| Service Fees | Income from providing services. |
| Miscellaneous | Other income not falling into standard categories. |
These tips will help you manage your income entries in FreshBooks more effectively. Accurate and regular updates ensure your financial data is reliable.
Troubleshooting Common Issues
Adding income in FreshBooks is usually straightforward. Sometimes, you may encounter issues. These can slow you down. This section covers common problems and how to fix them.
Resolving Entry Errors
Entry errors happen frequently. They can be frustrating. Follow these steps to resolve them:
- Double-check your entries: Ensure all fields have correct information.
- Verify dates and amounts: Make sure the dates and amounts are accurate.
- Review client details: Ensure client names and contact details are correct.
Still facing issues? Try deleting and re-entering the income.
Contacting Support
If you still face problems, contact FreshBooks support. They are helpful and responsive. Here’s how to reach them:
- Email support: Use the FreshBooks email support for detailed issues.
- Live chat: Ideal for quick questions and immediate help.
- Phone support: Call for urgent issues or complex problems.
Make sure you have your account details ready. This makes the process quicker.
Frequently Asked Questions
How Do I Add Income In Freshbooks?
To add income in FreshBooks, navigate to the “Invoices” section. Click on “New Invoice” and fill in the necessary details. Save the invoice to record the income.
Can I Track Multiple Income Sources In Freshbooks?
Yes, FreshBooks allows you to track multiple income sources. You can create separate invoices for each source and categorize them accordingly.
How Do I Categorize Income In Freshbooks?
To categorize income, go to the “Invoices” section. When creating an invoice, select the appropriate category from the options provided.
Is It Possible To Import Income Data Into Freshbooks?
Yes, you can import income data into FreshBooks. Use the import feature available in the “Settings” menu to upload your income records.
Conclusion
Adding income in FreshBooks is simple and efficient. Follow the steps to keep accurate records. This helps track your business finances easily. Remember to enter all details correctly. Regularly updating your income ensures accurate financial reports. FreshBooks makes managing your business finances straightforward.
Try it today and see the difference in your financial management. With FreshBooks, stay organized and focused on growing your business. Happy bookkeeping!
