

Setting up FreshBooks is simple and efficient. FreshBooks offers user-friendly tools for managing finances.
Whether you’re a freelancer or a small business owner, FreshBooks can streamline your accounting tasks. This guide will help you get started quickly. FreshBooks is designed to simplify invoicing, tracking expenses, and managing your finances. By following a few straightforward steps, you can have your account ready in no time.
From creating an account to customizing your settings, each step is easy to understand. You’ll soon see why FreshBooks is a popular choice for many business owners. Read on to discover how to set up FreshBooks and start managing your finances with ease.
Introduction To Freshbooks
Freshbooks is an accounting software designed for small businesses. It simplifies invoicing, expense tracking, and time management. Whether you are a freelancer or a small business owner, Freshbooks can help you manage your finances efficiently. In this section, we’ll introduce Freshbooks and its key features.
What Is Freshbooks?
Freshbooks is a cloud-based accounting software. It is tailored for small businesses and freelancers. This tool helps with invoicing, tracking expenses, and managing projects. Freshbooks also offers time-tracking and reporting features. It is known for its user-friendly interface and robust customer support.
Benefits Of Using Freshbooks
Using Freshbooks offers several benefits for your business:
- Easy Invoicing: Create and send professional invoices quickly.
- Expense Tracking: Easily track your business expenses.
- Time Tracking: Log hours worked and bill clients accurately.
- Project Management: Collaborate on projects and monitor progress.
- Reporting: Generate financial reports to understand your business better.
- Automation: Automate recurring invoices and payment reminders.
Freshbooks helps streamline your financial tasks. It saves time and reduces errors. This allows you to focus on growing your business.

Credit: www.youtube.com
Creating Your Freshbooks Account
Setting up your Freshbooks account is the first step towards seamless financial management. It’s simple and quick. Follow this guide to create your account and get started.
Sign-up Process
To begin, visit the Freshbooks website. Click on the ‘Get Started’ button. You will see a sign-up form.
- Enter your full name
- Type in your email address
- Create a strong password
After filling in the details, click the ‘Create Account’ button. Freshbooks will send a confirmation email to your provided email address.
Account Verification
Next, check your email for a message from Freshbooks. Open the email and click on the verification link. This step is crucial to verify your account.
Once verified, you will be redirected to Freshbooks. You can now log in with your email and password.
| Step | Description |
|---|---|
| Visit Website | Go to the Freshbooks website |
| Fill Form | Enter your name, email, and password |
| Confirm Email | Check your email for the verification link |
| Log In | Use your email and password to log in |
Now, your Freshbooks account is ready. You can start managing your finances efficiently.
Navigating The Dashboard
Setting up FreshBooks can be a breeze if you know how to navigate the dashboard. The dashboard is the control center where you manage all your financial tasks. Let’s explore how to make the most of it.
Main Features
The FreshBooks dashboard has several main features that help you manage your finances effectively. Here are some of the key components:
- Invoices: Create and send invoices easily.
- Expenses: Track your expenses and keep your budget in check.
- Time Tracking: Record the time spent on different projects.
- Reports: Generate financial reports to understand your business performance.
These features help you stay on top of your business finances.
Customizing Your Dashboard
Customizing your FreshBooks dashboard can make it more user-friendly and tailored to your needs. Follow these simple steps:
- Access Settings: Click on the gear icon to open settings.
- Choose Widgets: Select the widgets you want to display on your dashboard.
- Arrange Widgets: Drag and drop widgets to arrange them as you like.
Customizing your dashboard can save time and make your workflow smoother.
| Feature | Description |
|---|---|
| Invoices | Create and send professional invoices in minutes. |
| Expenses | Track and categorize your expenses with ease. |
| Time Tracking | Keep track of billable hours for different projects. |
| Reports | Generate detailed financial reports effortlessly. |
With these features and customization options, you can make the most of FreshBooks. Navigate the dashboard with ease and manage your finances more efficiently.

Credit: www.youtube.com
Setting Up Your Business Profile
Setting up your business profile in FreshBooks is a crucial step. It ensures your invoicing and financial records are accurate. This section will guide you through the process.
Entering Business Information
First, log into your FreshBooks account. Navigate to the ‘Settings’ tab. Under ‘Company Profile’, enter your business name, address, and contact details. Ensure the information is correct.
Use the following steps:
- Click on ‘Settings’.
- Select ‘Company Profile’.
- Fill in your business name.
- Enter your address.
- Provide your contact details.
Double-check for typos. This information appears on your invoices.
Adding Your Logo
Next, add your business logo. A logo makes your invoices look professional. It also helps your clients recognize your brand.
Follow these steps to upload your logo:
- Go to ‘Settings’.
- Select ‘Company Profile’.
- Click on ‘Upload Logo’.
- Choose your logo file.
- Click ‘Save’.
Ensure your logo file is clear and high-quality. This enhances your business image.
Summary Table
| Step | Description |
|---|---|
| 1 | Navigate to ‘Settings’. |
| 2 | Select ‘Company Profile’. |
| 3 | Enter business information. |
| 4 | Upload your logo. |
Once complete, your business profile is set up. Now, you can create professional invoices with ease.
Managing Clients And Contacts
Managing clients and contacts in FreshBooks helps streamline your business operations. A well-organized client list saves time and improves efficiency. Let’s dive into how to manage clients and contacts effectively.
Adding Clients
Adding clients in FreshBooks is simple and quick. Follow these steps:
- Log in to your FreshBooks account.
- Navigate to the Clients tab.
- Click on the New Client button.
- Fill in the client’s details such as name, email, and address.
- Click Save to add the client to your list.
Ensure you input accurate information. This helps in seamless communication and invoicing.
Organizing Contacts
Organizing contacts in FreshBooks helps keep your client database tidy. Here are some tips:
- Group clients by categories like regular or one-time.
- Use tags for easy filtering and searching.
- Regularly update contact details to maintain accuracy.
You can also import contacts from other software. This saves time and ensures consistency.
| Client Management Task | Steps to Perform |
|---|---|
| Adding a new client | Go to Clients tab, click New Client, fill details, and save |
| Updating client information | Click on client name, edit details, and save changes |
| Organizing contacts | Use tags, group clients, and update information regularly |
Keeping your client list organized boosts productivity. It makes invoicing and communication effortless.
Creating And Sending Invoices
Setting up FreshBooks is easy and convenient. One important aspect is creating and sending invoices. This process ensures that you get paid on time and keep track of your finances. Let’s dive into how you can create and send invoices using FreshBooks.
Invoice Templates
FreshBooks offers a variety of invoice templates to suit your needs. These templates are customizable and professional. You can add your business logo, change colors, and include all necessary details.
Here’s how to choose and customize an invoice template:
- Go to the “Invoices” section in FreshBooks.
- Click on “Create New Invoice.”
- Select a template from the available options.
- Customize the template with your business details.
- Save the template for future use.
Using templates saves time and ensures consistency in your invoicing process.
Sending Invoices To Clients
Once your invoice is ready, it’s time to send it to your clients. FreshBooks makes this process simple and efficient. Follow these steps:
- Review the invoice for accuracy.
- Click on the “Send” button.
- Choose the client from your contacts list.
- Add a personalized message, if necessary.
- Click “Send Invoice.”
Clients will receive the invoice via email. They can then view and pay the invoice online. FreshBooks also provides tracking, so you know when a client views the invoice.
Using FreshBooks for creating and sending invoices streamlines your billing process. It helps you get paid faster and keeps your records organized.
Tracking Expenses
Tracking expenses in FreshBooks is crucial for managing your business finances. It helps you understand where your money goes. FreshBooks makes this process simple and efficient. Let’s explore how to track your expenses effectively.
Adding Expenses
To add an expense in FreshBooks, follow these steps:
- Log in to your FreshBooks account.
- Click on the Expenses tab in the sidebar.
- Click on the New Expense button.
- Fill in the necessary details such as date, amount, vendor, and description.
- Upload any receipts or attachments if needed.
- Click Save to record the expense.
Adding expenses regularly keeps your records up to date. It also makes tax time easier.
Categorizing Expenses
Categorizing your expenses helps you understand spending patterns. It also ensures accurate reporting.
Here’s how you can categorize expenses in FreshBooks:
- After adding an expense, select the appropriate category from the dropdown menu.
- Categories may include Office Supplies, Travel, Meals and Entertainment, etc.
- You can create custom categories if the default options do not fit your needs.
- Click Save to apply the category to the expense.
By categorizing expenses, you can quickly see where you spend the most. It also helps in creating detailed financial reports.
Proper categorization ensures that your financial statements are accurate. It also aids in budgeting and financial planning.
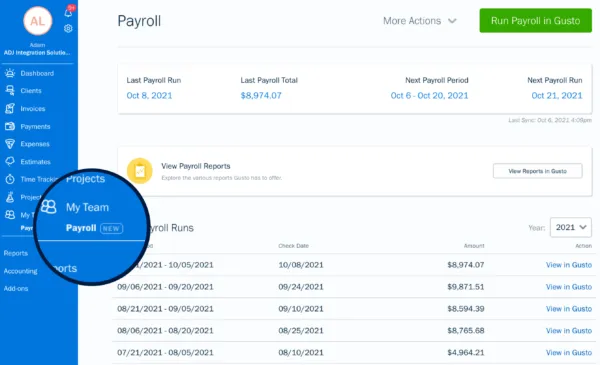
Generating Reports
Generating reports in FreshBooks helps you understand your business performance. With easy-to-use features, you can create detailed reports. These insights help you make informed decisions. Let’s explore how to generate different types of reports in FreshBooks.
Financial Reports
Financial reports provide a snapshot of your business finances. To generate a financial report in FreshBooks, follow these steps:
- Log in to your FreshBooks account.
- Navigate to the Reports section from the main menu.
- Select the desired financial report type such as Profit and Loss or Balance Sheet.
- Customize the date range and filters as needed.
- Click Generate Report.
These steps will give you a detailed financial report. You can export these reports to share with stakeholders.
Client Reports
Client reports give insights into client activities and billing. To generate a client report in FreshBooks, follow these steps:
- Log in to your FreshBooks account.
- Go to the Reports section from the main menu.
- Select the Client Report option.
- Choose the client and specify the report details.
- Click Generate Report.
These reports help you track client payments and outstanding invoices. Customize them to focus on specific clients or time periods.
FreshBooks makes generating reports easy. Use these reports to gain valuable insights into your business.
Integrating With Other Tools
Integrating Freshbooks with other tools can streamline your business processes. This integration helps you manage finances more efficiently. It saves time and reduces errors. Below, we will explore two key integrations: Payment Gateways and Third-Party Apps.
Payment Gateways
Integrating Freshbooks with payment gateways allows you to accept online payments easily. This ensures faster transactions and improved cash flow. Here are some popular payment gateways you can integrate with Freshbooks:
- PayPal: Widely used and trusted by businesses and consumers.
- Stripe: Known for its flexibility and ease of use.
- Square: Great for small businesses and retail operations.
To set up a payment gateway, follow these steps:
- Log in to your Freshbooks account.
- Navigate to the “Settings” menu.
- Select “Accept Payments.”
- Choose your preferred payment gateway and follow the setup instructions.
After setup, your clients can pay invoices directly through Freshbooks. This reduces manual entry and speeds up payment collection.
Third-party Apps
Freshbooks offers integration with various third-party apps to enhance its functionality. These apps can help with different aspects of your business.
Some popular third-party apps include:
- G Suite: Sync your Freshbooks data with Google Docs, Sheets, and Calendar.
- Slack: Receive Freshbooks notifications and updates within your Slack channels.
- Trello: Link Freshbooks projects with Trello boards for better project management.
To integrate third-party apps, follow these steps:
- Go to the Freshbooks “App Store.”
- Search for the app you want to integrate.
- Click on the app and follow the setup instructions.
Integration with third-party apps allows seamless data exchange. It enhances productivity and reduces the need for manual data entry.
Credit: www.freshbooks.com
Tips And Best Practices
Setting up FreshBooks for the first time can feel overwhelming. But, knowing some tips and best practices can make the process smoother. Here are some suggestions to help you get started efficiently.
Optimizing Your Workflow
Efficient workflow is critical for saving time. Use FreshBooks’ features to streamline your tasks. Here are some ways to do that:
- Automate Invoicing: Set up recurring invoices for regular clients. This saves time and ensures timely payments.
- Expense Tracking: Use the mobile app to snap pictures of receipts. Categorize expenses immediately to avoid end-of-month chaos.
- Time Tracking: Utilize the time tracking feature. It helps you bill clients accurately and track how your time is spent.
- Project Management: Use FreshBooks to manage projects. Assign tasks, set deadlines, and track progress all in one place.
- Integrate Apps: Connect FreshBooks with other tools you use. This can include payment processors, CRM systems, or even your email.
Common Mistakes To Avoid
Even with the best intentions, it’s easy to make mistakes. Here are some common errors and how to avoid them:
| Mistake | Solution |
|---|---|
| Not Backing Up Data | Regularly export your data. Keep copies in a secure location. |
| Ignoring Reports | Review reports regularly. They provide valuable insights into your business. |
| Not Customizing Invoices | Use FreshBooks’ customization options. Make your invoices look professional. |
| Forgetting to Categorize Expenses | Immediately categorize expenses. This makes tax time easier. |
| Not Using Payment Reminders | Set up automatic payment reminders. This helps reduce late payments. |
By following these tips and avoiding common mistakes, you can set up FreshBooks efficiently and make the most out of its features.
Frequently Asked Questions
What Is Freshbooks Used For?
FreshBooks is used for managing invoices, expenses, and client billing. It simplifies accounting for small businesses.
How Do I Set Up Freshbooks?
Sign up on FreshBooks’ website. Follow the guided setup process to enter your business details.
Is Freshbooks Free To Use?
FreshBooks offers a 30-day free trial. After that, choose a suitable subscription plan.
Can Freshbooks Integrate With Other Tools?
Yes, FreshBooks integrates with various tools like PayPal, Stripe, and G Suite for seamless workflow.
Conclusion
Setting up FreshBooks is simple and beneficial for your business. Follow the steps outlined, and you’ll be ready to manage finances efficiently. FreshBooks offers easy invoicing, expense tracking, and time management. It helps streamline your tasks. With these tools, you can focus more on growing your business.
Start today and enjoy a smoother financial process. FreshBooks makes your accounting straightforward and stress-free. Happy bookkeeping!
